Inventory
⚠️
This article needs to be updated after changes in gameplay regarding:
- new collections (gallery, button, sticker, plush, stone, stamp)
- inventory expansion
- weapon durability
The Inventory
By: Thornes
Your inventory is going to play a very big part in your gameplay, as it is the place where you can move, sell, transfer and even use your items! The inventory has lots of different features and links to a lot of different pages of Furvilla, so here is an in-depth guide, explaining all the features of the inventory!
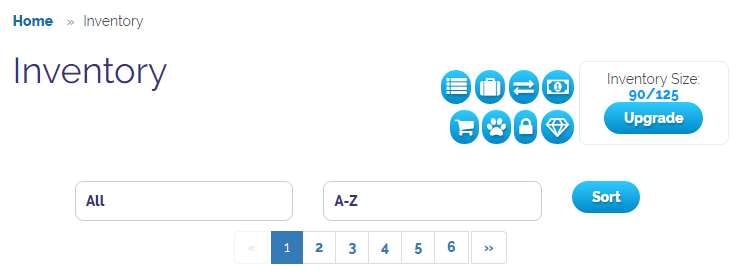
The picture above shows you what the inventory looks like, minus the items, of course. The buttons on the top right of the page might be very hard to understand in the beginning, but don't worry, you will get used to them pretty soon!

You will be using this panel a lot, as the buttons lead you to a lot of different features of the site, such as your stall and your menagerie!
 Quickstock - Quickstock allows you to easily move, sell or discard your items in bulks within just a few clicks.
 Storage - The storage allows you to store items you find no use to right now, but might need in the future. You won't be able to use any of the items in the storage, unless, of course, you move them back to the inventory!
 Item Transfers - Through item transfers you can receive items from other users or send items to other users.
  Currency Transfers - Through currency transfers you can receive currency from other users or send currency to other users.
 Manage Stall - In your stall you can sell your items to other users.
 Menagerie - In your menagerie you can collection both a male and a female of each animal species and their coloration.
  Bank - The bank allows you to withdraw and deposit both FurCoins and FurDollars, could be very useful if you want to save some money!
 Redeem Code - Codes you might get through a contest or the kickstarter or any other event, can be redeemed here.
 Inventory
Upgrading and Inventory Size

On the top right of your inventory page, you'll see this little box. This indicates your inventory size, meaning that whenever you hit the maximum of hundred, you will need to upgrade it to be able to have more items in your inventory! The first number indicates your current amount of items and the second number indicates your maximum amount of items you can hold in your inventory.
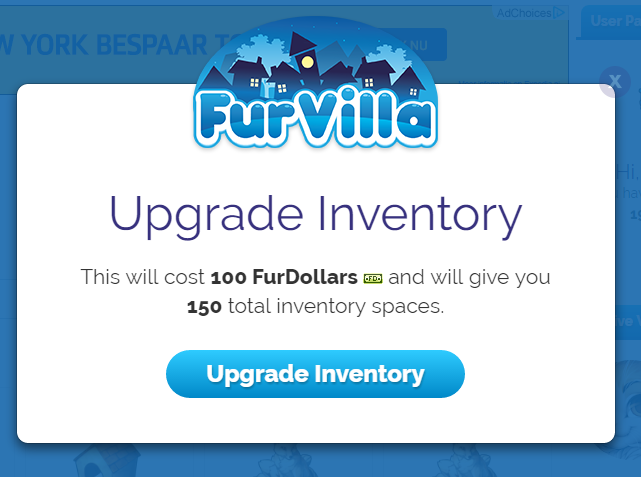
You can get more space for your inventory by clicking on the upgrade button. Upgrading your inventory will cost you FurDollars. As a new player you start out with 100 inventory spaces, your first upgrade will cost you 50 FurDollars and give you 25 extra inventory spaces.
Each time you upgrade, your inventory size will increase by 25 inventory spaces. The price of this upgrade will increase with 50 FurDollars for each time you upgrade: so your second upgrade will cost 100 FD, your third 150 FD and so on.
Sorting your items

Beneath the panel and your inventory size, you can find an option to sort your items in a particular way, so you can easily find particular items such as medicines or animals.
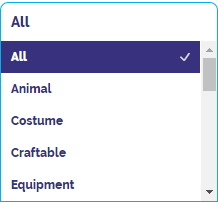
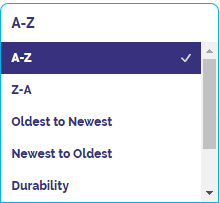
The first dropbox saying 'All' will lead you to quite a long list with item classifications, you can easily browse through it and click on one of the classifications to easily view all the items of that classification in your inventory.
The second dropbox saying 'A-Z' indicates the order in which your items show. The options are pretty self-explanatory. Durability is mostly used for items such as weapons, houses, stalls or pots. Potency is mostly used for medicines. Time To Next Breed is mostly used for animals.
Using your items
The inventory uses a very easy and interactive way to use your items. All you have to do is just click on the item you want to use and a pop-up message will show up with a lot of different options for you to choose from!
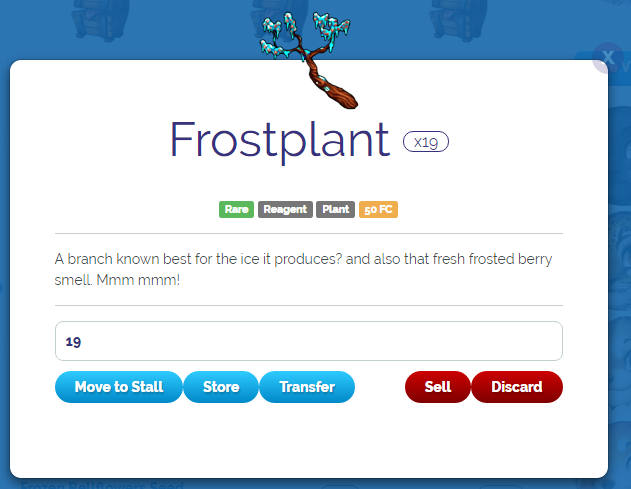
When you have clicked on an item, this is the pop-up message that shows up. As you can see there are a lot of different things you can do with this particular item. The pop-up also gives you a short description of the item. It also indicates how many items you have, as most items stack in your inventory! As you can see in the pop-up message I showed to you, I have 19 Frostplants.

These little buttons give you some more information about the item you are looking at.
The green button tells you something about the rarity of the item. There are four different rarities in the game: common, uncommon, rare and super rare!
The gray button indicates the item classifications of your selected item, most of the times there is only one classification, but there are some items who show more than one, as you can see in the image above!
The yellow button indicates the amount of FurCoins you will get if you auto-sell the item back to the game, this price mostly depends on what the rarity is of the item.

These five buttons are the most important feature of your inventory. From here you can move, sell or discard things.
Move to Stall - By clicking on this button you will immediately move your items to the stall, from where you can sell them to other users of Furvilla.
Store - By clicking on this button you will immediately move your items to the storage, you can use this option if you don't think you need this item right now, but might find it useful for the future!
Transfer - By clicking on this button you will be able to send an item to another user, this has the same function as the 'item transfer' button from the panel I have explained before.
Sell - By clicking on this option you can sell your items back to the game for the base price the game gives for it, this price is indicated by the yellow button, as explained before.
Discard - By clicking on this option you can discard your items. You won't be getting any FurCoins from discarding an item, so only do this when you are entirely sure about it!
Quickstock
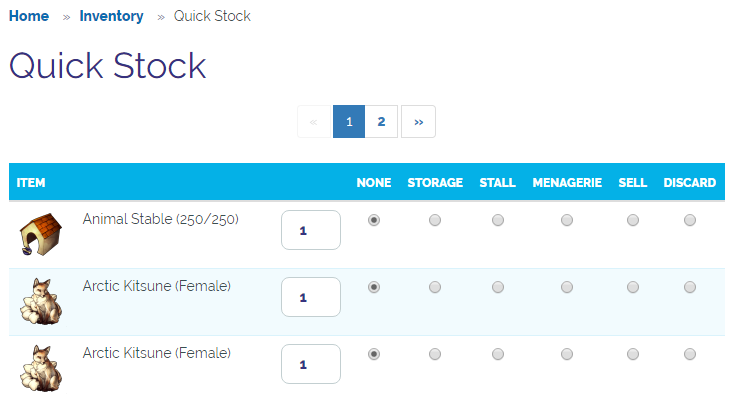
Quickstock allows you to easily organize your inventory. It is especially helpful for whenever you have to move, sell or discard a lot of items at the same time.
All you have to do to move your items around, is to select the option you want to use. Please keep in mind that stall and sell are two completely different things. Selecting the Stall option will bring your item(s) to the stall, where you can then sell them to other users of Furvilla. Clicking on the Sell option will sell your items back to the game for the base price the game offers for it.
After you are all done organizing your inventory, you can click on the 'submit' button and the bottom of the page. After this you will need to confirm your actions a second time, please be sure to check what you have selected once more before you confirm, because after this there is no way back and your items will be moved, sold or discarded!
Storage
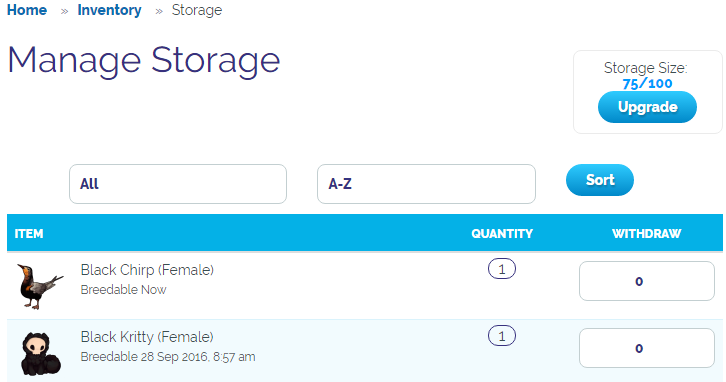
The main purpose of your storage is to store all items you find no use to right now, but might find useful in the future! You won't be able to use your items when they are in your storage.

You can easily withdraw your items by clicking on the withdraw button next to the item you want to move back to the inventory. You can select multiple items at the same time. If you are ready to move your items back to the inventory, all you have to do is scroll down and click on the 'withdraw' button at the bottom of the page.

Very similar to your inventory space, your storage also has a storage size. The first number indicates how many items you have already stored in the storage and the second number indicates the maximum amount of items you can store here. If your storage starts to get a bit full, perhaps it's a good idea to start upgrading your storage space!
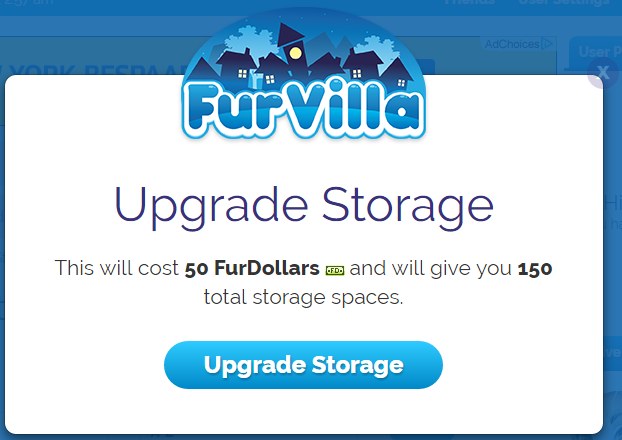
Upgrading your storage space is just a tiny bit different from upgrading your inventory space. You will need 50 FurDollars for your first upgrade, which allows you to have an extra 50 storage spaces.
Each time you upgrade, the amount of FurDollars will increase by 50 and your total amount of storage spaces will increase by 50 too.
Item Transfers
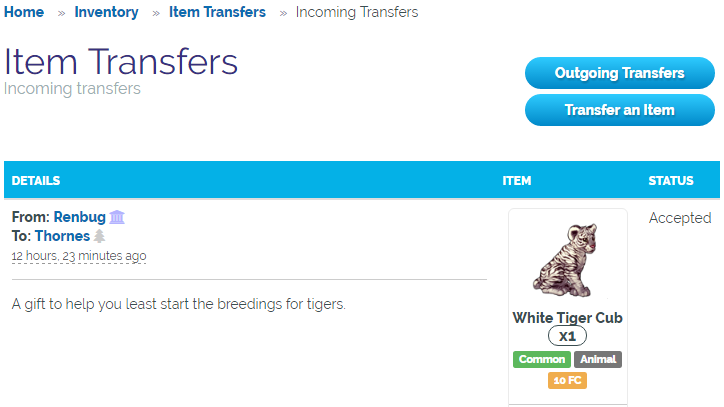
The Item Transfers page allows you to transfer items to other users as well as receive items from other users. You will have to either reject or accept the transfer that has been sent to you. The status of the transfer tells you if you have yet to accept/reject it or have already accepted/rejected it.

Outgoing Item Transfers
You can also decide to check on your outgoing item transfers, by clicking on the above button. You can find this button in the top right of your item transfers page.
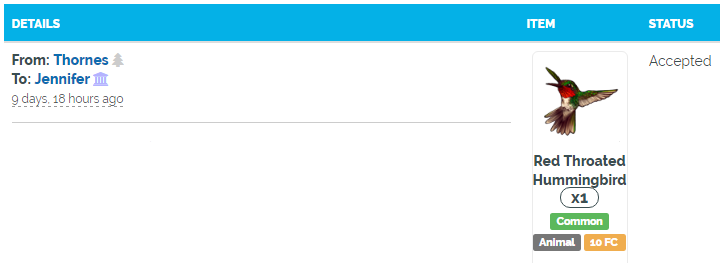
The Outgoing Item Transfers page shows you all the item transfers you have sent to other users, you can view their status right here and when needed reject an outgoing item transfer if you have either made a mistake or the other side takes too long to accept the transfer.

Transfer an Item
To transfer an item to another user, you will need to click on the transfer an item button, which you can also find in the top right of the page. A transfer item screen will soon pop up. Keep in mind you can only transfer 1 item at a time. If you want to transfer multiple items at a time, If you are actually looking to transfer a lot of items at the same time, we would suggest using the trading system instead.

Before sending an item transfer to another user, you will need to add their ID number right here. You can find someone's ID number by going to their profile page: you will find it under 'user ID'.
It is wise to click on the check button before sending the trade. This way you will be entirely sure you have entered the right ID number.

After you have clicked on check, the box will present you with the username of the ID number you have entered. If this is not the person you want to send your item transfer too, all you have to do is click on the cancel button and enter a new ID number!
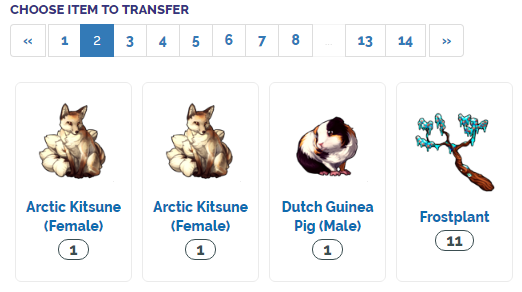
After you have added the right ID number to the tranfers and you're entirely sure you are sending your transfer to the right person, you can start selecting the item you want to send to them.

After you have selected the item, you can decide what quantity you want to send to the other user. If this is not the right item, you can always go back to the previous page by clicking on cancel. This will not cancel your whole item transfer, this will only bring you back to the page where you can select items.
You can also decide to add a description to your transfer, this is however entirely optional: you don't have to add a description to your transfer if there is no need to do so. It might be useful though to add a description to your transfer if you are transferring it for a certain purpose or haven't talked to the other user about this: this way the other party knows why you have sent the item their way.
Besides adding a description, you can also decide to send the transfer anonymously. If you send the transfer anonymously, the other user won't be able to see your username, thus won't know you sent the transfer.
Currency Transfers
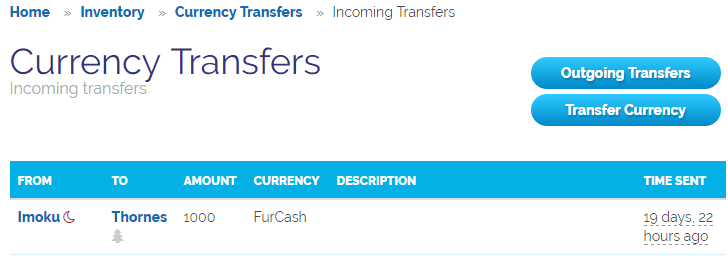
You can transfer currency through the currency transfers page, this page works quite similar to the item transfers page.
You do not have to accept or reject currency transfers, as soon as someone transfers something to you, it will be added to your currency, same goes for when you send a currency transfer to another user.

Transfering currency is the same as transfering items, the only difference is in the above image. Instead of selecting an item, you will have to add an amount of either FurCoins or FurDollars to the amount box. After that you will need to select what type of currency you want to send: either FurCoins or FurDollars.
Stall
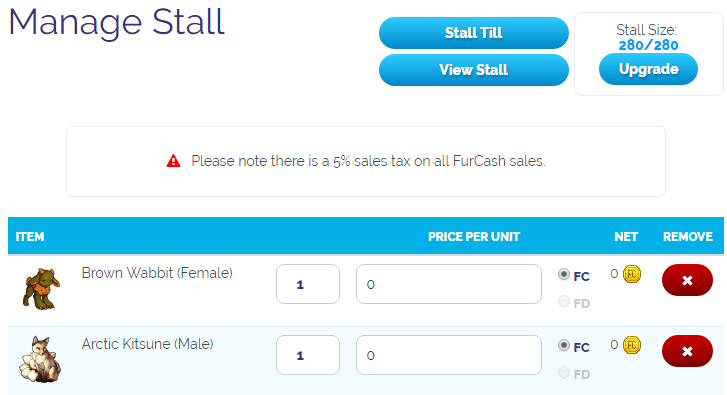
In your stall you can sell items to other users of Furvilla for either FurCoins or FurDollars. Keep in mind that there is a 5% sales tax on all FurCoins sales, but don't worry about calculating how many FurCoins you will get out of your sales this way, because the game does that for you! These sales taxes are only for FurCoins sales, they do not count if you sell something for FurDollars!

As you can see, the game calculates how many FurCoins you will get when you sell something for FurCoins. If I were to sell this Brown Wabbit for 500 FurCoins, I would only get 475 FurCoins when someone buys it: this means I will have to pay 25 FurCoins to the game as a tax.

Every time you change something in your stall, you will need to update your stock. If you do not update your stock, every change you made will not be saved. You will need to scroll down and click on the 'update stock' button to save the changes you have made in your stall.

Every stall comes with a stall size. If you have just started out, you will be able to have 100 items in your stall. By clicking on the upgrade button you can upgrade your stall. The first upgrade costs you 100 FC and will increase your stall size by 10 slots. The number of FurCoins you will have to pay will increase by 100 FC every time you upgrade, so the second time you will need to pay 200 FC for 10 more slots and so on.

Your Stall Till
Every time you sell something, the currency you earn will go to your Stall Till. You will need to withdraw the money from your stall till to be able to use it.

Be sure to check your Stall Till every time you have sold something. Everything you earn through your stall will go here and will not be added to your current currency until you have clicked on the 'withdraw' button!

The Stall Till allows you to enable or disable notifications. If you have checked the box you will get notifications whenever you sell something, this way you will know when you have to go to the stall till! Very useful if you don't want to check the stall till every now and then!

The Stall Till also shows you an useful list of your sell history. This way you can see what you have sold in the past and to whom you have sold it.
To see your own shopping history you will need to go to the User Stalls and then click on the 'Shopping History' button on the top right of your page.
Menagerie
Your Menagerie is the place where you can show off and collect your mini pets. Other users will be able to view your menagerie by going to your profile and clicking on the paw button. You will be able to collect both a male and a female of each species and coloration here: this also means you can't add doubles to your menagerie: if you, for example, have already added a female winter ferret, you won't be able to add another female winter ferret to the menagerie!

The Collection box shows how many different animals you can collect on Furvilla. As you can see, there are over 500 animals to collect on Furvilla. You won't be able to upgrade your menagerie: this number will only change whenever the staff adds another species to the game.
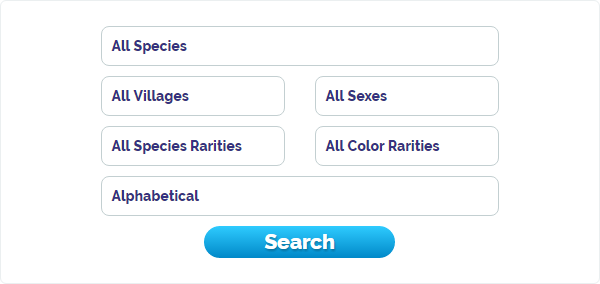
You can easily search for a specific type of pet through your menagerie by using the sort option. There are currently six ways to sort your animals:
All Species - This dropdown box will show you all the species Furvilla currently has, you can click on a certain species and those species will show up in your menagerie (if you have already added them to your menagerie of course, if not, you will get an error that says: 'No animals stabled.').
All Villages - Through this dropdown box you can select a certain type of village, every village has their own set of animal species, so if you are looking for animals from a specific village, this option is the one you should use!
All Sexes - There are two types of sexes your pets can have, male and female. You can search for a specific sex by clicking on this dropdown box and either selecting female or male, depending on what you're looking for.
All Species Rarities - There are four different types of species rarities: common, uncommon, rare and super rare. If you are looking for a pet with a certain species rarity, you should use this option!
All Color Rarities - Within a species there are four different types of coloration, each of those have a rarity: common, uncommon, rare and super rare. If you are looking for specific color rarities, you should use this option.
Alphabetical - Through this dropdown box you can select the order in which the animals will appear. You can choose from: alphabetical, newest to oldest and oldest to newest.
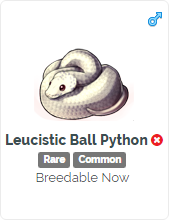
All animals in the menagerie are displayed like this. You can view their information in this little box. The species shown above is a leucistic ball python. To remove the animal from the menagerie you will need to click on the red button with the cross.
The two grey boxes indicate the animal's color and species rarity. The first box indicates the color rarity, in this case rare and the second box indicates the species rarity, in this case common.
The box also tells you when you can breed your pet. This pet is a male, so it is always breedable now. Females can however have a breeding cooldown attached to them, if this is the case, the box will tell you when you can breed her again! You will need to take the pet out of the menagerie before you are able to breed it with your animal husbandrist.
Bank

The bank is a place where you can save your money, when it's in the bank you will not be able to use it when purchasing an item (unless you were to withdraw the money before purchasing the item, of course). So if you don't feel very comfortable walking around with all that money on your account, or you just want to save something for later, you can deposit it here!
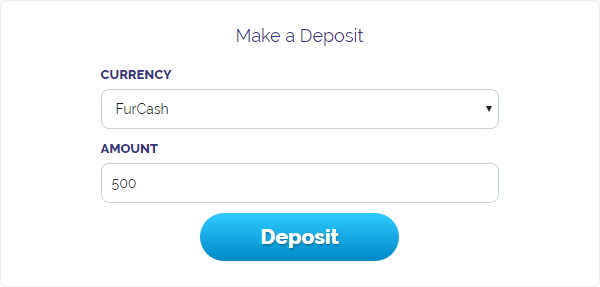
To deposit your money, all you have to do is add the right amount of FurCoins or FurDollars to the deposit box and click on the deposit button. You can change what type of currency you want to deposit in the currency box.
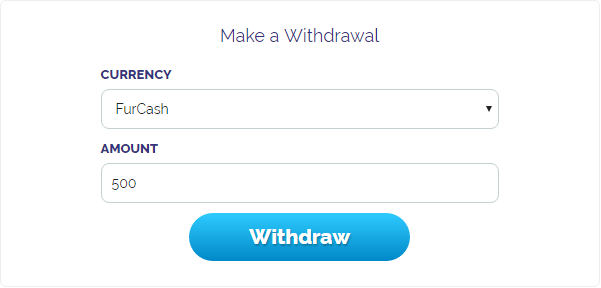
To withdraw your money you'll need to go to the 'make a withdrawal' box and add the right amount of currency you want to withdraw to the amount box. This works exactly the same as depositing your money.
Redeem Codes

There are just a few ways to gain a code in Furvilla, this could be through winning contests, the kickstarter or other events the site hosts. These codes could offer you certain types of items, you can redeem your codes here!
To redeem a code you will first need to check the code, this will not use your code, but only check if the code is valid. If it is, a pop-up will show up asking if you want to redeem the code.

